More resources
On top of the information below, I can recommend a few other resources:
-
Building iPhone Apps with HTML, CSS, and JavaScript
is the only book I found that covered everything. I highly recommend it if you're planning on doing serious app development in JavaScript.
-
If you'd like to get into native app development, take a step back and learn Objective-C first.
The best Objective-C book I've found is
Cocoa and Objective-C: Up and Running
.
- My post on multitouch robot control with iOS. It's another great example of what you can do with just JavaScript.
Making it full-screen
Normally, if you press "+" in mobile Safari and then "Add to Home Screen," the icon it creates acts like a bookmark into Safari. When the browser opens up, you've got the URL bar at the top and the button bar at the bottom. If you're trying to deploy a real app, this just wastes screen real estate and detracts from its professional feel.
To get rid of the URL and button bars, just add a meta tag:
<meta name="apple-mobile-web-app-capable"
      content="yes" />
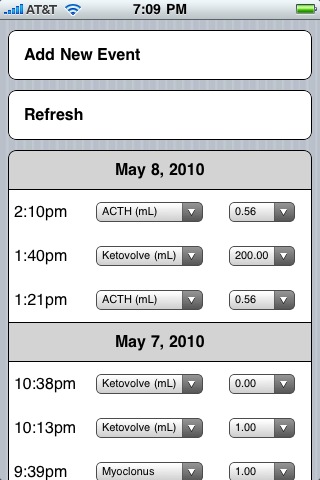
This is what my log app looks like when launched from the home screen:
Changing the phone status bar
You can also change how the phone's status bar is displayed with a meta tag. You can make it white, black or translucent:
<meta name="apple-mobile-web-app-status-bar-style"
      content="default" />
The values for content are default,
black and black-translucent.
Preventing scaling
If you pinch on a web app, it still responds like it's in a browser and zooms in. This can be a giveaway that the app isn't native. If you want to prevent scaling, use the viewport meta tag:
<meta name="viewport"
    content="user-scalable=no, width=device-width" />
You'll almost certainly want to set the viewport width to the device width as well, so that the app shows up at its natural resolution.
Preventing elastic scrolling
If you a flick a web app past the bottom or top of the page, the page itself gets elastically tugged away from the URL bar or the button bar (or the bottom/top of the screen if it's in full-screen mode).
This behavior is another giveaway that your app isn't native, and it's rarely the behavior you want in a native app.
To stop this behavior, capture touchmove events on
the document in JavaScript and cancel them.
You can do this by adding a handler to the body tag, and
invoking the preventDefault method on the event object:
<script>
 function BlockMove(event) {
  // Tell Safari not to move the window.
  event.preventDefault() ;
 }
</script>

<body ontouchmove="BlockMove(event);" >
  ...
</body>
Creating a home screen icon
To add a home screen icon, create a 114x114 .png file, and then link to it in the header:
<link rel="apple-touch-icon"
      href="./apple-touch-icon.png" />
The iPhone automatically applies the glossy finish.
On older iPhones, which used 56x56 icons, and the iPad, which uses 72x72 icons, the graphic automatically scales down.
If you don't want the glossy finish applied automatically, use apple-touch-icon-precomposed instead of
apple-touch-icon.
Creating a splash screen
To add a splash screen during loading, create a 320x460 .png file, and then link to it in the header:
<link rel="apple-touch-startup-image"
      href="./startup.png" />
The file must be exactly 320x460, or else the iPhone ignores it. (The iPad requires 1004x768.)

Caching application files
If you want to be able to use your application without internet, or you want to improve its load time, create a cache manifest file, and link to it from the main file for the web app:
<html manifest="cache.manifest">
Make sure your web server serves up .manifest files with the MIME type text/cache-manifest, or else this won't work.
If you're using apache, put the following in your .htaccess file:
AddType text/cache-manifest .manifest
And then check using wget -S that the content type in the response headers is correct.
Inside the cache.manifest file, list which files should be cached
and which should be retrieved from the network:
CACHE MANIFEST
local1.file
local2.file

NETWORK:
network1.php
network2.cgi
If you find your app suddenly stopped working when you started using a cache manifest, make sure every URL you use is in the right section.
When a cache manifest is in use, the app launches with the last version of the files.
It pulls a new version of the manifest in the background if network connectivity is available, and on the next launch you'll see the new version if the manifest has changed. You'll want to include a serial number in a comment in the cache manifest, so that you can up it every time you release a new version; for example, here's my logging application's manifest:
CACHE MANIFEST

# Bump this with each release:
# Serial number 7

apple-touch-icon.png
jquery.js
scroll-bg.jpg
startup.png
medical-log.css
medical-log.js
cached.html

NETWORK:
show-log.php
insert-into-log.php
delete-log-entry.php
update-log-entry.php
I recommend renaming the manifest file so that it 404s during iterative development.
Detecting touch and gesture events
You can capture multi-touch and gesture events in JavaScript. And, there's a good reason to do this too: if you listen for traditional events like clicks, you'll get a one second delay while the iPhone highlights the element that was "clicked." If you're trying to mimic a real app, this behavior starts to feel tedious and slow. By capturing touch events directly, you can respond instantly to user input.
There are two ways to track touch events. When you capture raw touch events, you're tracking individual fingers. When you capture gesture events, you're capturing interpretations of finger movement, like scaling and rotating.The touch handlers you can attach to are:
ontouchstart- a finger goes down.ontouchmove- a finger moves.ontouchend- a finger goes up.
The gesture handlers you can attach to are:
ongesturestart- a scale or a rotation starts.ongesturechange- a scale or a rotation.ongestureend- a scale or a rotation ends.
If you just want to use touching in place of clicking, then the
target field of the event object contains the element
that was touched.
I created an example app that uses gestures to scale a graph.
There's also a great write-up of touch and gesture events in JavaScript, if you want to provide deeper multi-touch support.
For more code and a second JavaScript app that uses gestures heavily, see my second iPhone app post: a multitouch remote control for a robot.
Detecting rotation events
If you want to take an action when the phone is rotated, listen
for onorientationchange events on the body
tag.
The current orientation is in window.orientation, and it
is encoded as the angle (in degrees) that the iPhone is rotated--0,
-90 or 90--away from vertically upright.
Mimicking iPhone OS components
The webkit rendering engine supports a lot of CSS extensions, and you can use these to simulate native Cocoa components; for example, buttons are easy:
.button {
 font-family: Helvetica ;
 font-weight: bold ;
 padding: 15px;
 border: 1px solid black ;
 -moz-border-radius: 8px ;
 -webkit-border-radius: 8px ;
 margin-top: 10px ;
 margin-bottom: 10px ;
 background-color: white ;
}
I created the iPhone-like background for my logging app with a
background-image for the document body.
The book
Building iPhone Apps with HTML, CSS, and JavaScript
can show you how to simulate all of the standard iPhone UI elements.
Creating a native "Objective-C" app
If you want to publish your app in the app store,
you'll need to write it in Objective-C.
Fortunately, Cocoa includes a UIWebView class, which is
just the Mobile Safari browser without its chrome.
So, you can actually bundle your HTML/CSS/JavaScript app up natively
by wrapping it in a few lines of canned Objective-C.
Of course, once you wrap your web app up as a native app, you can use Objective-C to access more features of the iPhone.
If you want to get into Objective-C programming,
I recommend the book
Cocoa and Objective-C: Up and Running
as both a reference and a tutorial.
Here are the bare bones steps to turning a web app into a native app:
- Open XCode.
- Create a new "View-based Application" iPhone project.
- Move the files for your web app into the Resources folder in XCode, but strip out the cache manifest. (You don't want the manifest screwing things up, since everything is now local.)
- Create a new instance variable, webView, inside the @interface ViewController header file:
   IBOutlet UIWebView* webView ;
   // IBOutlet means it's visible to Interface Builder.
and create a property:@property (nonatomic, retain) UIWebView *webView;
-
In the ViewController implementation file, synthesize webView:
@synthesize webView;
- Open the ViewController interface file from Interface Builder Files folder.
- From the Library's Objects menu, drag a Web View component into the layout/design window.
- Select the ViewController.xib window, and then File's Owner.
- Connect (by dragging) the webView outlet from the connections window to the Web View.
- Return to XCode.
-
Implement the viewDidLoad method in the ViewController implementation file:
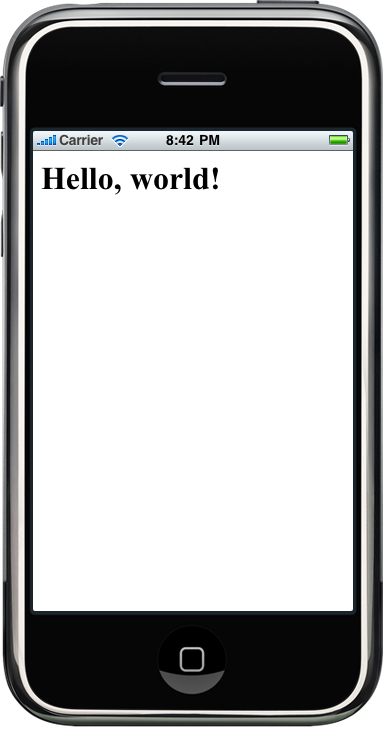
- (void)viewDidLoad {
 [super viewDidLoad];
  NSString *filePath =
   [[NSBundle mainBundle] pathForResource:@"index" ofType:@"html"];
  NSData *htmlData = [NSData dataWithContentsOfFile:filePath];

  if (htmlData) {
   NSBundle *bundle = [NSBundle mainBundle];
   NSString *path = [bundle bundlePath];
   NSString *fullPath = [NSBundle pathForResource:@"index"
                                  ofType:@"html" inDirectory:path];
   [webView loadRequest:[NSURLRequest requestWithURL:
                          [NSURL fileURLWithPath:fullPath]]];
  }
}
This will load index.html from the Resources folder on launch. - Fire it up in the simulator. You should now see your app.
Confused? Just download my pre-configured web application XCode project, and drop your files into Resources.
Tips
- Download the iPhone SDK and test with the simulated iPhone/iPad Safari. Only do tests on the iPhone itself when you're checking to see if performance is good enough.
- Install the app from an IP address rather than a hostname to cut out the DNS look-up time on application launch.
- JavaScript on the iPhone doesn't handle lots of string manipulation well; prefer DOM tree manipulation for constructing user interfaces over mashing innerHTML.
- Take advantage of JavaScript libraries like jQuery for cutting down on the tedium.
iPad quirks
Creating native iPad web apps is almost identical to creating native iPhone web apps. The biggest changes are that your start-up image must be exactly 1004x768. Other than that, it's mostly the same.
Detecting iPhone OS
You might want your app to behave a little differently depending on where it's run. I used the following JavaScript to detect if the app is running inside an iPhone, an iPod Touch or an iPad:
 var IsiPhone = navigator.userAgent.indexOf("iPhone") != -1 ;
 var IsiPod = navigator.userAgent.indexOf("iPod") != -1 ;
 var IsiPad = navigator.userAgent.indexOf("iPad") != -1 ;

 var IsiPhoneOS = IsiPhone || IsiPad || IsiPod ;
Hosting
If you're looking for a hosting provider for your web app, I recommend linode.com
I've been running might.net on a linode for years, and I'm using them to host my medical logging app.
They're hard to beat for price, performance, flexibility and customer service.
Code
Feel free to use my template.html, a stubbed-out blank web app.
Example: Multi-touch graph navigation
I wrote an app that creates a full screen canvas and then lets you zoom in and out of the graph of f(x) = sin(x) using the pinch-to-zoom gesture.
This runs well on my iPad and in the simulator, but it's a little choppy on my first-gen iPhone.
Feel free to poke around and modify the code: graph.html.
Example: Medical logging application
The medical logging app is a nice example because it caches much of itself locally, resorting to the network only for synchronization via PHP scripts that interact with a database.
And, it's been a major quality-of-life improvement for me and my wife.
Download the medical logging app source code.